
Photo by EasyCloudify
How to Deploy OpenClaw on EasyCloudify
6 min read
Table of Contents
- Choosing the Right Deployment Path
- Key Takeaways
- Option A: 1-Click Deploy
- Option B: Managed App Platform
- FAQ
- Next Steps
Introduction
OpenClaw (formerly Moltbot and Clawdbot) is an open-source personal AI agent you can run on your own infrastructure. It connects to the LLM of your choice and lets you interact through messaging apps you already use WhatsApp, Telegram, iMessage, Slack, or Discord. From there it can manage files, run terminal commands, control a browser, handle email, and much more.
Running OpenClaw on your personal laptop might seem convenient, but it's not a great idea in practice. Granting an AI agent deep access to the same machine that holds your personal data introduces unnecessary risk. A dedicated cloud server keeps things isolated, gives you an always-on environment, and lets you connect from any device.
EasyCloudify offers two deployment paths for OpenClaw:
- 1-Click Deploy — a security-hardened server image, up and running in minutes with minimal configuration.
- Managed App Platform — a fully managed, scalable environment suited for teams or production-grade workloads.
If you prefer to provision and configure a bare server yourself, that's also possible, but the steps below will cover both managed options.
Choosing the Right Deployment Path
| 1-Click Deploy | App Platform | |
|---|---|---|
| Best for | Solo developers, fast experimentation | Teams, production workloads |
| Setup complexity | Low | Low–Medium |
| Control | High | Moderate |
| Auto-scaling | Manual | Automatic |
| Auto-restarts | Via systemd | Built-in |
| Starting price | $15/month | Varies by plan |
Both options apply the same core security measures automatically:
- Gateway authentication — a token is generated on first boot, so only authorized clients can reach your OpenClaw instance.
- Hardened firewall — rate-limiting rules on OpenClaw ports block excessive traffic and reduce exposure to denial-of-service attempts.
- Non-root execution — OpenClaw runs under a dedicated unprivileged user, limiting blast radius if something unexpected happens.
- Docker sandbox — the agent operates inside an isolated container, preventing unintended interactions with the host system.
- DM pairing — only paired messaging accounts can communicate with your instance, blocking unauthorized users by default.
Note: OpenClaw is a fast-moving project and some skills or integrations may require additional manual configuration when running with these security layers in place. This is expected — the tradeoff is well worth it compared to running the agent with unrestricted access.
Key Takeaways
- OpenClaw is a capable self-hosted AI agent, but it should never run on a machine containing personal or sensitive data you're not comfortable exposing.
- Deploying to a dedicated cloud instance — whether via 1-Click or the App Platform — provides meaningful security isolation out of the box.
- OpenClaw is model-agnostic; bring your own API key for whichever LLM you prefer.
Option A: 1-Click Deploy
Step 1 — Provisioning Your Instance
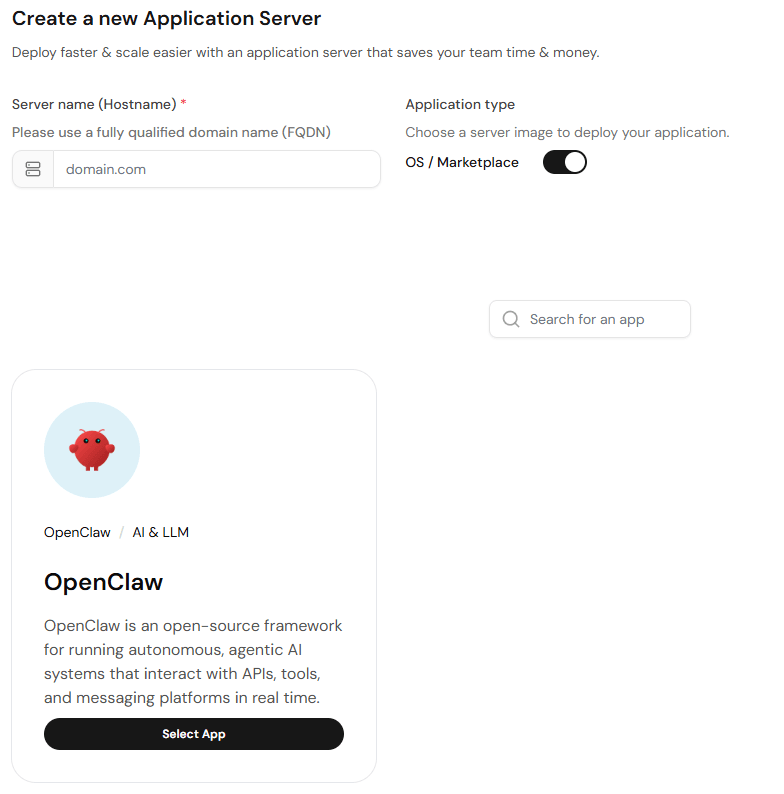
Log in to your EasyCloudify account and navigate to Deploy Server. Under Application type, open the Marketplace switch and search for OpenClaw. Select the official OpenClaw image from the results.
For the server plan, choose at least 4 GB RAM — this is the minimum recommended to run OpenClaw reliably alongside its Docker sandbox.
Under Authentication Method, add your SSH public key. If you haven't set one up yet, follow the SSH key setup guide in the EasyCloudify documentation.
Give the server a recognizable name (e.g., openclaw-prod) and click Deploy Server. Full initialization takes a couple of minutes.
Once the server is ready, connect via SSH using its public IP:
bashssh root@your_server_ip
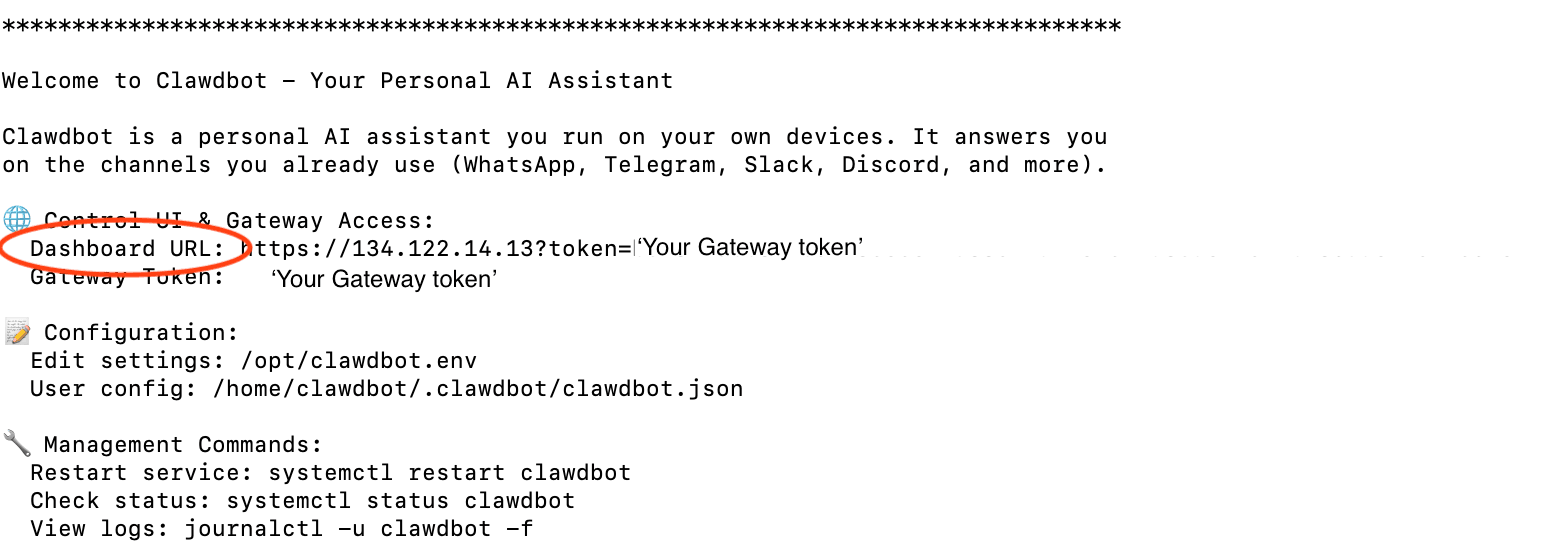
After logging in, the OpenClaw setup wizard will launch automatically. Look for the Dashboard URL in the Control UI & Gateway Access section of the welcome output — you'll need it in the next step.
When the wizard prompts you to select an AI provider, choose from the available options (Anthropic is supported today; additional providers are being added) and enter your API key.
Step 2 — Accessing and Configuring OpenClaw
Once the API key is saved, the wizard may offer to run pairing automation. This step links your browser-based dashboard to your OpenClaw gateway. Follow the on-screen instructions: open the Dashboard URL in your browser and paste your gateway token into the settings panel to complete pairing.
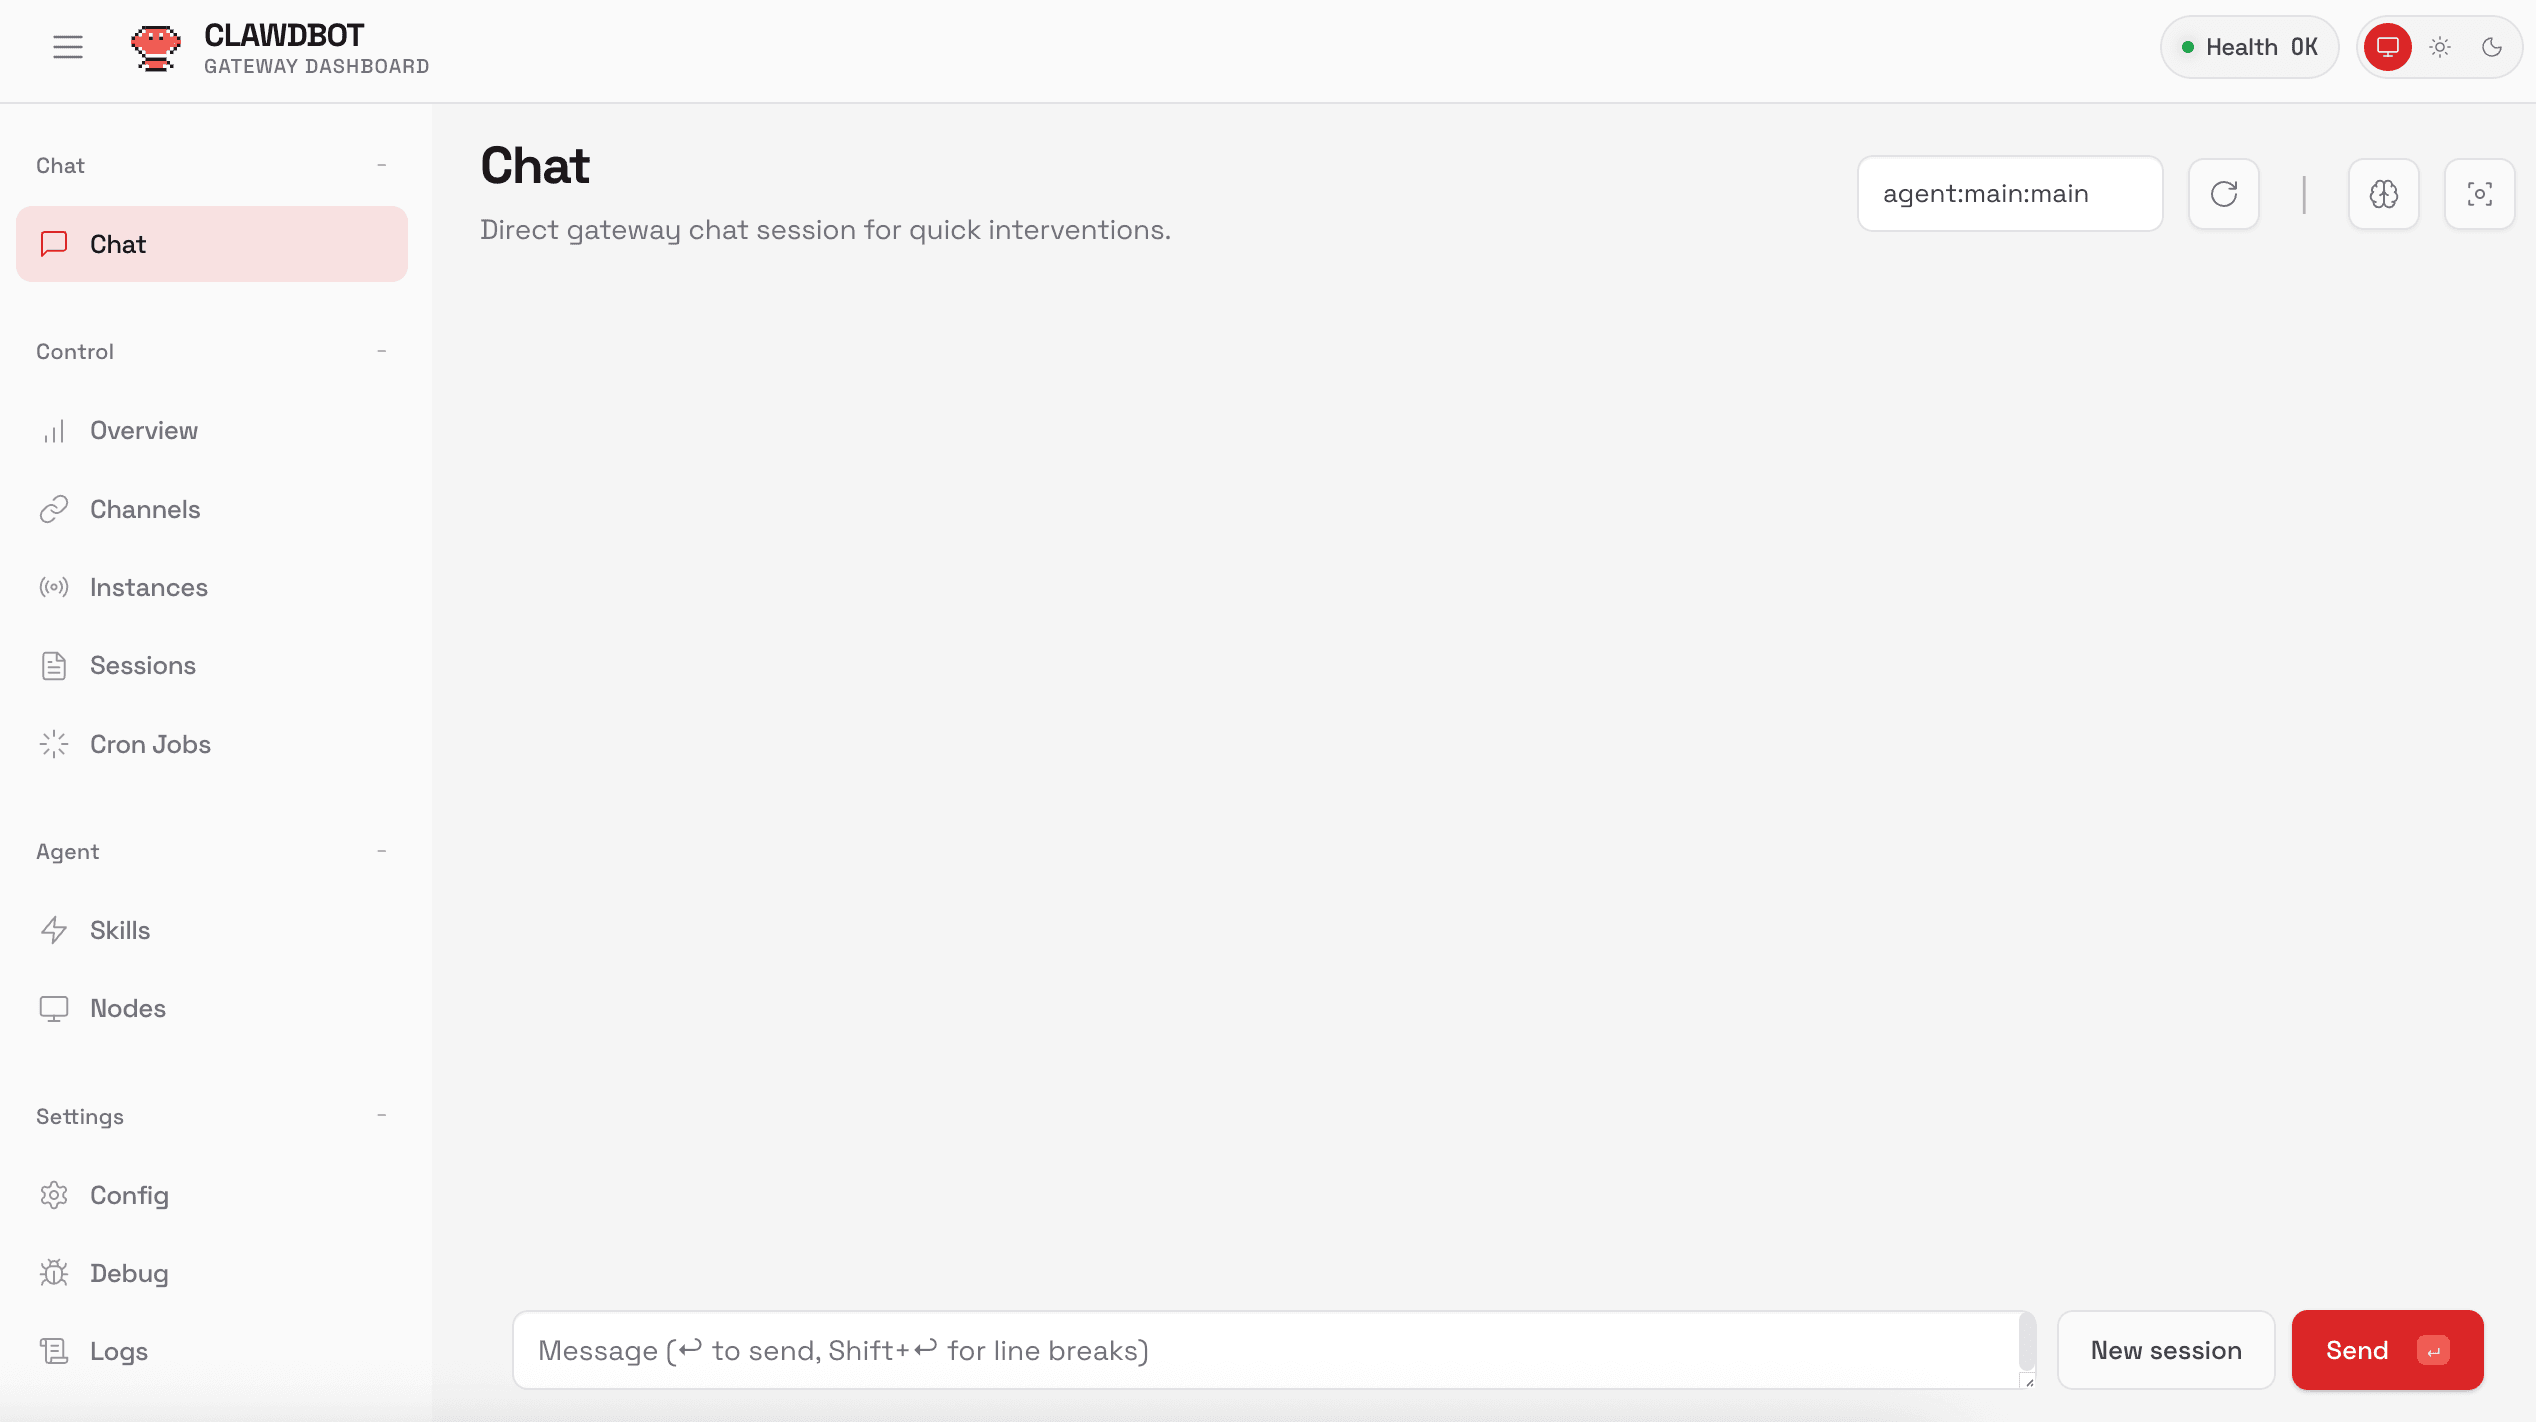
After refreshing, you'll land on the main chat interface. You can send messages directly and OpenClaw will respond. For example:
shellYou: What files can you currently see?
shellOpenClaw: Here's a list of files and directories in the sandbox workspace: . ------ AGENTS.md ------BOOTSTRAP.md ------HEARTBEAT.md ------USER.md -----skills/ --- 1password/ ---- SKILL.md ...
From the dashboard you can review token usage, configure messaging channels, schedule cron jobs, manage skills, and adjust other settings.
Prefer working in a terminal? A text-based interface is also available:
bash/opt/openclaw-tui.sh
Note: Depending on the version installed, the script may be located at
/opt/clawdbot-tui.sh.
Step 3 — Installing AgentSkills (1-Click)
Your instance ships with 50+ skills pre-loaded in the registry. To install additional ones, open the Skills section of the browser dashboard, search for what you need, and click Install.
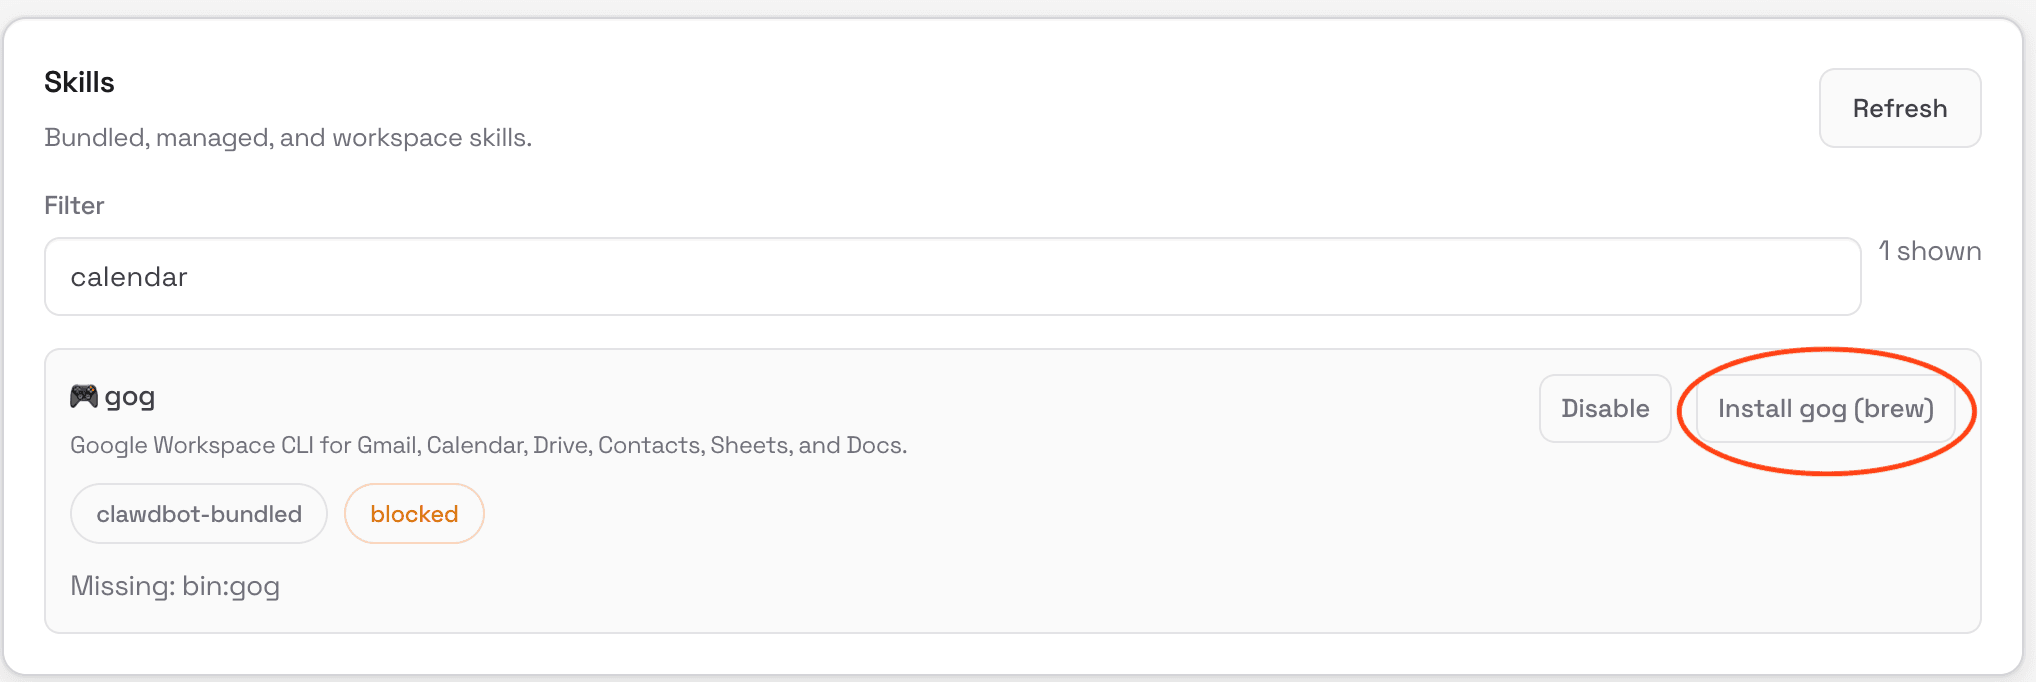
For example, to set up a Google Calendar integration, search calendar and install it with one click. Skills cover a broad range: file management, browser automation, smart home control, health monitoring, social media scheduling, and more.
Option B: Managed App Platform
Step 1 — Creating the App
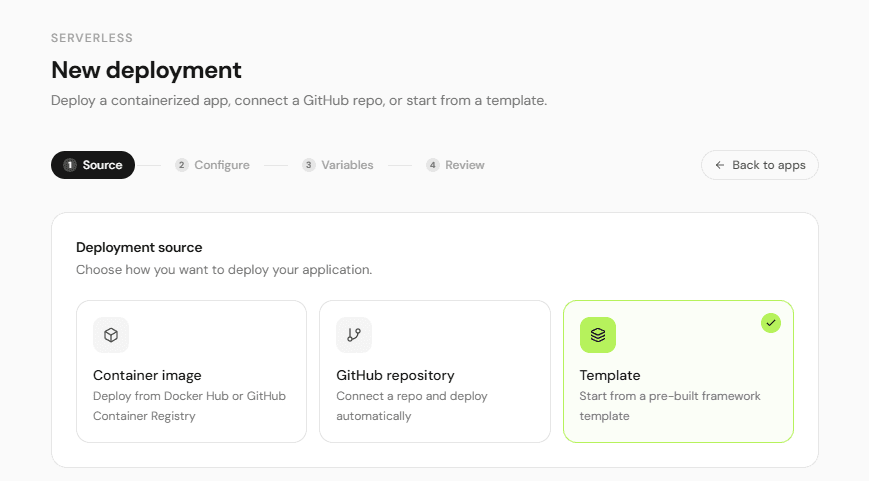
Navigate to the Serverless section of your EasyCloudify dashboard and click Create. Select Template or your own Github repository and connect the OpenClaw Serverless repository.
In the Environment Variables section, click Edit and add your model API key to the PROVIDER_API_KEY field. This connects your AI provider to the OpenClaw runtime.
Click Create App. The initial build typically takes around five minutes.
Once the build completes, open the Console tab and verify the service is healthy:
bashopenclaw gateway health
Step 2 — Connecting OpenClaw to WhatsApp
From the console, switch to the dedicated OpenClaw user:
bashsu openclaw
Then navigate to that user's home directory:
bashcd
Now start the channel setup wizard:
bashopenclaw channels add
Select WhatsApp from the list, follow the prompts, and scan the QR code with your phone. Once paired, you can send messages to your OpenClaw instance directly through WhatsApp.
Step 3 — Installing AgentSkills (App Platform)
From the openclaw user session in the console, list available skills:
bashopenclaw skills
Find one you want and install it by name:
bashnpx clawhub install <skill_name>
Replace <skill_name> with the identifier shown in the registry listing. From here you can run openclaw to explore any other available commands and configuration options.
FAQ
Can I use a model other than Anthropic's Claude?
Yes. OpenClaw is model-agnostic by design and supports a range of LLMs through API keys. With the EasyCloudify 1-Click image, Anthropic is the primary supported provider today, with additional integrations rolling out over time. You can also configure alternative models manually via the CLI.
Which operating systems does OpenClaw support?
OpenClaw runs on Linux, macOS, and Windows. The EasyCloudify deployment paths use Linux under the hood — which is the most stable and well-tested environment for server-side deployments.
What are the main security risks to be aware of?
The most significant concerns are OpenClaw's broad system access and its ability to execute arbitrary code. Deploying to an isolated cloud instance — rather than your personal machine — substantially reduces these risks. Keep an eye on which skills you install and what permissions they request.
How do I grant specific API keys to individual agents?
In the OpenClaw dashboard, go to the Agents section and select the agent you want to configure (or choose Defaults to apply settings globally). Under Sandbox > Docker > Env, add the API keys that agent should be allowed to use. This gives you fine-grained control over which agents can access external services.
How does pricing work?
EasyCloudify server costs start at $15/month for the 1-Click deployment. Separately, you'll pay for LLM API usage based on the number of tokens consumed. If you configure scheduled tasks or autonomous automations, token costs can add up quickly — keep an eye on your model provider's usage dashboard.
Next Steps
You now have a fully operational, security-hardened OpenClaw instance running on EasyCloudify. From here:
- Add more skills from the AgentSkills registry to expand what your agent can do.
- Connect additional messaging channels — Slack, Telegram, Discord, and iMessage are all supported.
- Set up cron jobs to automate recurring tasks without any manual prompting.
- Review the OpenClaw documentation for advanced configuration options.
Deploy your own always-on AI agent in minutes. Get started with EasyCloudify
Filed under
AIStay up to date on cloud computing
Get product updates, tutorials, and DevOps insights delivered to your inbox. No spam, unsubscribe at any time.

